OP-Z 11. Master/Lights/USB Flashcards
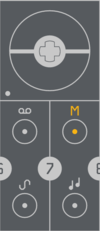
Master

the master track allows you to transpose selected tracks and create harmonic chord progressions. the OP-Z automatically analyses the notes used in the bass, lead, arp and chord tracks to determine the key of the pattern. using the piano keys it is then possible to change key / mode. use the dials to control the master effects and filter.
Green Dial

Turn the green dial to adjust the master chorus effect. this will also add a subtle stereo effect.
Blue Dial

The blue dial controls the master drive, adding a subtle overdrive to your mix.
Yellow and Red Dials

The yellow and red dials control the master filter. It’s a combination high-pass / low-pass filter, with an unaffected neutral setting in the middle.
Transpose Tracks

OP-Z automatically analyses the notes used in the bass, lead, arp and chord tracks and detects the mode and key of the active pattern.
the bass track is the main source for this analysis.
using the piano keys it is then possible to transpose the pattern and change its key and mode.
to choose which tracks to be included press and hold shift and press the different track buttons. to include a track make sure its track led is lit.
use the transpose buttons to change octave used (represented by the value keys).
pro-tip: transposing drums can be a great way to do drum fills.
Chord Progressions

By programming different chords onto the master track you can create chord progressions. Program the master track just like any of the audio tracks. hold track + shift and choose playback speed using the value keys. A setting of 4 gives you afour bar loop.pro-tip: extend the master track duration by lowering the playback speed to allow for longer sequences.
Lights

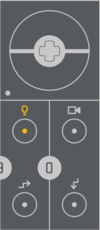
The OP-Z has a separate track dedicated entirely to controlling your light rig.you can program this track just like any other track on the OP-Z.
set pattern

use the value keys to select one of the 10 patterns.
effects

play the white keys to trigger effects and animations.
preview mode

toggle between fixture preview and step view
main color
(green dial)

the main color applied to all connected rgb fixtures
alternate color
(blue dial)

used by certain effects to instantly switch color
pattern speed
(yellow dial)

the scroll speed of the currently selected pattern
intensity
(red dial)

the default intensity of the currently lit fixtures
setup

to control dmx you need a usb dmx interface connected to the OP-Z. It can be connected directly to the usb port.
connecting the dmx interface directly to you OP-Z is convenient but might deplete you battery faster than you want. in that case, use a powered hub.
refer to the usb chapter to learn which hubs and dmx interfaces that are compatible with OP-Z (sold separately).


