ARCHIVE - ORIGINAL DECK Flashcards

On 04.03.21 I duplicated the persent deck of 181 cards into three decks of more or less 60 cards, to make study easier. So, if as a learner you find these decks, the ones named 1 to 3 should be the ones to go for, unless you think you can handle a deck of 181 cards?...

1
Q

In editing mode, what are the shortcut keys to move between screens?

A

Project Panel - Shift 1
Source Monitor - Shift 2
Timeline - Shift 3
Program Monitor - Shift 4
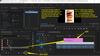
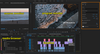
2
Q

new project dialog:
How to avoid loss of data in the event of disk failure?

A

‘Project Auto Save’:

by default is set to ‘Same as Project’, but in case of disk crash of your laptop, having your live project saved to an external disk will preserve your work.

3
Q

the folders that hold clips in the media browser are called…?

A

bins

4
Q

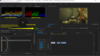
import a clip into the Source Monitor from the Project Panel - how?

A

either drag or x2click the clip

5
Q

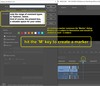
What is the key-based Timeline navigation system called?
(backward, stop, forward)

A

JKL

  • *J** is backward
  • *K** is pause
  • *L** is forward
6
Q

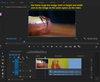
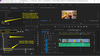
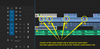
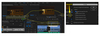
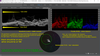
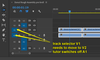
the names of the four screens in Pr, clockwise, from bottom, left:

A
  • PROJECT PANEL
  • SOURCE MONITOR
  • PROGRAM MONITOR
  • TIMELINE
7
Q

How do you import a folder and its contents (yes, including subfolders) into the media browser?

A

x2-click the empty space and navigate to the folder and click ‘Import Folder’

8
Q

beautiful shortcut key to expand a selected panel:

A

the backtick key
- it’s below the Escape key!

9
Q

What does it mean to ‘mark a clip’

A

It simply means selecting a segment of it that you want to use, leaving out the before and after.
Adding an In and an Out is what you’re doing.

to get to the point where to insert an In or an Out point, you can ‘scrub’ the playhead to get there. You can, of course, use the JKL keys as well.
Not happy with an In or Out point? No sweat: move to where you want the new In/Out and hit the command again - the existing mark is replaced with the new one.

10
Q

in the ‘Timeline’ panel, what’s the keyboard shortcut to display your stuff full-width?

A

the \ key

NOTE: if you hit the \ key again, it will revert to the previous view.

11
Q

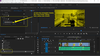
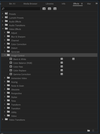
In the Project panel, the various items are prefixed with colour-coded squares -
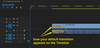
What is the default colour for sequence?

A

GREEN

12
Q

What’s the difference between transcoding and creating proxies?

A

Transcoding is the generic term for re-encoding any video into a video with different settings. Proxies, are the lower quality files you reference while editing, but if you set up correctly in Premiere, it knows to give you the proxy files while editing.

13
Q

In the Project panel, what’s the difference between duplicating and copying files?

A

Duplicate files have the suffix ‘copy1’ added to them;
Copies look exactly the same as originals - and can thus be a source of confusion.
NOTE: files in the Project panels are mere shortcuts, and deleting them does not affect the actual files, which reside somewhere else, on your computer or external hard disk.

14
Q

What should you do - EVERY TIME - with your sequence at the end of a work session?

A

You should duplicate it.
You should also add the date of that edit to its name.
If you mess up your sequence in your next work session, you can always go back to your previous version!

15
Q

JKL tricks
How to:

  1. play in slow motion
  2. play one frame at a time
  3. play at increased speeds
A
  1. Hold down K, then hold down J/L
  2. Hold down K, then tap J/L
    1. very handy for navigating audio
  3. double-tapping J/L plays at double the speed
    1. further, single, taps increase speed even more.
16
Q

In/Out creation
How to keep your original In/Out when creating a new one?

A
  1. in Assembly Mode
  2. You have an In/Out already in Program Monitor
  3. and so you go: Menu//Make Subclip (Ctrl+U)
  4. dialog - name your subclip

subclips are either unrestricted or restricted
- meaning that you can either drag to recover some or all the footage on either end of the clip or you don’t.
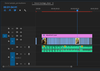
NOTE: restricted clips, both video and audio, on the Timeline, sport tiny white triangles at their top corners.
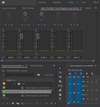
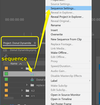
17
Q

Sequence settings -
how to change them?

A
  1. right-click the sequence in Project Panel
    1. select ‘Sequence Settings’
  2. tweak settings in dialog

REMEMBER: the first clip you import in the Timeline: its properties will be applied to the entire sequence.

18
Q

Sequence -
defining the settings even before you start populating the Timeline:

A
  1. right-click in an empty space in the Project Panel
  2. New Item / Sequence
  3. ‘New Sequence’ dialog pops up
19
Q

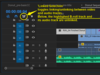
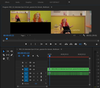
Moving a clip from the Source Monitor to the Timeline - what is the keyboard shortcut?

A

comma

20
Q

What is the keyboard shortcut to play a segment between an In and an Out?
(applies to both the Source Monitor and the Timeline)

A

Ctrl+Shift+Spacebar

21
Q

make the playhead snap to either end of a clip in the timeline

A

Shift + drag playhead
You can also use the Up and Down arrows
(in my case, my Down arrow is out of order…)

22
Q

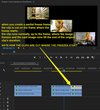
Dragging a clip from the Source Panel into the Timeline and in-between two clips on the timeline -

what needs to be done to avoid overwriting anything already on the Timeline?

A

Ctrl + drag

23
Q

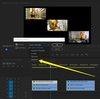
Hovering your cursor over a video’s thumbnail causes it to play.

That action is called…

A

hoverscrub

24
Q

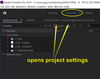
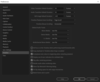
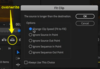
How do you display project settings?

A
  • go in ‘Assembly’ mode
    (top menu in Pr)
  • in Media Browser menu bar, click ‘Ingest’
  • the ‘Project Settings’ dialog pops up

NOTE

Under the ‘Ingest’ dropdown you can select ‘General’, Scratch Disks as well as ‘Ingest Settings’.

25
Q

How to separate segments (clips) in the Timeline?
What’s the tool’s keyboard shortcut?
What’s the operation’s keyboard shortcut?

A
  1. Track Select Forward tool (A)
  2. select clip to be moved (and all on the right of it)
  3. Alt + Right Arrow
    1. this moves things one frame at a time
    2. add Shift and it’ll be 5 frames at a time
26
Q

move a clip around in a sequence on the Timeline - how?
What’s the visual cue?
What function needs to be active?

A

Ctrl + drag

visual cue: vertical dotted line punctuated with large white triangles
Make sure ‘Snap in Timeline’ (S) is on.
To move one of more tracks and leave others out, the command changes to Ctrl+Alt+drag.

27
Q

How do you close a gap in your sequence in the Timeline?

A
  1. click the gap to select it
  2. Alt + Backspace

NOTE

this operation is the same to delete one or more clips on the Timeline

28
Q

remove clips from Timeline -
Lift v. Extract:
Whats the difference?

A

Lift ( ; ) leaves a gap
Extract ( ‘ ) leaves no gap

29
Q

remove clip from Timeline with In/Out & Apostrophe

A

set an In and an Out for the segment of clip to be removed and hit Apostrophe (Extract)

30
Q

Under ‘Ingest Settings’,
what does ‘Create Proxies’ do?

A

It creates lowres versions of the HD originals, so as to minimise RAM stress.

31
Q

Ripple Edit Tool:
What does it do?
What is the shortcut?
What is its visual cue?
Why is it better than In+Out+cut?

A

It is used to tweak clips on the Timeline.
The shortcut is B.
The visual cue is a yellow bracket.

Hold down the Ctrl key to access the tool on the fly.

The tool is better than In+Out+Extract because it bypasses those stages: you drag over the part of the shot you want to trim, let go and you’re done. Also, contrary to an ordinary crop (V), the Ripple trim does not leave a gap.

32
Q

Ripple Edit Tool:

When the section of a clip you want to trim in the Timeline is so short that simply dragging the Ripple Edit tool would make it hard to precisely select the section to eliminate, what is the keyboard shortcut to trim one frame at a time?

A
  1. hit B
  2. click down on the spot from where you want to trim
    1. you may want to set markers for both start and end of footage to cut
  3. Ctrl + Left / Right arrow
33
Q

Ripple Edit Tool -
how to use it on the fly?

A
  1. park your cursor at the boundary between two clips on the Timeline
  2. hold down the Ctrl key and carry out your trim
  3. let go of Ctrl key and you’re back in default mode
34
Q

Ripple Edit Tool:
What is the super-fast keyboard shortcut to perform a trim between your yellow bracket and the playhead?

A

E

35
Q

Rolling Edit Tool:
concisely define roll editing.

A

The tool (N) is parked on the boundary between two clips in the Timeline and dragged, shortening one clip and expanding the other.

36
Q

Rolling Edit Tool:
what type of editing is it and what do you need to turn off?

A

Roll trims are micro editing, and as you drag, if snapping is on, the tool will snap to edit points and markers - very annoying! - and so you’ll want to disable snapping (S).

37
Q

Rolling Edit Tool:
As you drag the tool, what happens in the Program Monitor?

A

two shots are shown:
left, the A-side clip previews its last image;
right, the B-side clip previews its first image.
This creates the possibility of having two images that, between them, create a visually smooth transition. In the course, tutor ends the A-side on two hands that have just tied a knot; in the B-side, a rolling pin reaches the end of a lump of dough

38
Q

Rolling Edit Tool:

What is the keyboard shortcut?
Where is the button?

A

N

The command is nested under the Ripple Edit Tool.

39
Q

Rolling Edit Tool:

How do you trim only the video or only the audio?

A

by holding down the Alt key

40
Q

shot from Timeline to Source Monitor
keyboard shortcut is…

A
  1. select shot
  2. hit F
41
Q

a slip edit
shortcut key?
what is it?

A

Y

A slip edit consists in adjusting the in and out points of a clip simultaneously by the same amount in the same direction, right on the Timeline. The duration of the clip stays the same.

Using the Slip Tool, you drag over the clip(s) before or after the one you’re editing, but these other clips are NOT affected in any way.

And so as you drag to the left or right of your clip to edit, you are, if dragging to the left, ploughing back what comes before your existing In point; if dragging to the right, accessing what comes after your Out point.

What you gain to the left is lost to the right: if you plough back 15 frames left of your In point, you push out and replace them with younger ones.

42
Q

a slide edit -
shortcut key?
what’s that?

A

U

In slide editing you move a shot on the Timeline, not changing it in any way. However, as you drag over the preceding shot you are cropping it as you go; conversely, you are lengthening the crop you are dragging away from.

Now, cropping, say, the left shot, may leave the latter so much cropped as to compromise its value. And so, you do have the option of selecting more than one shot (using good ole Shift) for you to drag.

43
Q

Razor Tool:
How to cut only video OR audio?

A

hold down Alt

44
Q

Replace Edit:
method 1/2
(longer version)

A

A shot on the Timeline shows a scene from a distance.
Having a version of the same scene from another angle and at close range, you want replace a segment of the shot in the Timeline with some of that close-up footage:

  1. Alt+C, creating a segment in the shot on the Timeline to be replaced with the some of the other footage.
    1. Alt+C because you want to only cut the video, not the sound
  2. load the shot with the replacement segment in the Source Monitor and create an In only - NO OUT - the cut segment in the Timeline sets the duration, and therefore the Out point as well.
  3. Alt drag the preview in the Source Monitor onto the cut segment on the Timeline
  4. Done
45
Q

Replace Edit -
method 2/2
(shorter version)

A
  1. in the Timeline, cut the segment to be replaced (Alt+C to only cut the video, not the audio
  2. in the Source Monitor and the Timeline, place the playhead at the exact start point where the replacement footage start (in the Timeline, that’ll be the left end of the cut segment, obviously.)
  3. right-click the cut segment in the Timeline:
    1. ‘Replace With Clip’ / From Source Monitor, Match Frame’
46
Q

What command is this?
What is it used for?
How?

A

the Track Select Forward Tool.
Nestled below it is the Track Select Backward Tool.
It’s used to create a gap in a sequence.

How:

  1. select the clip from where to create a gap
  2. Alt + Right Arrow (move 1 frame)
    1. or hold down and drag
47
Q

Markers -
How do you add a marker on the ruler in the Timeline panel?
How do you summon the ‘Marker’ dialog?

A

Adding a marker:

  1. make sure nothing is selected
  2. position playhead on a spot on the ruler
  3. hit M
  4. Boom!

to view the dialog, hit M a second time.
if wanting to access the dialog later, x2-click the marker

Check out the attached screenshot to acquaint yourself with the dialog.

48
Q

Marker Panel
Yes, there is a marker panel!
Where is it?

A
  1. go to Project Panel
  2. browse through tabs to, er, ‘Markers’
  3. any markers will be listed
    1. NOTE!!! if anything is selected on the Timeline, no markers will be displayed
49
Q

Markers -
add a marker to a clip - not on the ruler

A

just select the clip and hit M

NOTE:
You can add a marker to the Source clip:

  1. create your marker
  2. perform a match-frame (F)
  3. in the Source Panel, the ruler displays the Marker
    1. and you can Alt+drag the marker to give it duration
50
Q

Timeline - dial in location
(Alternative to using J or L to navigate the scale)

A

Either scrub the blue digits of click to activate and dial in the exact location on the ruler.

51
Q

What is the ‘Linked Selection’ command?

A

As often as not, a video clip is ‘married’ to an audio clip.
You may want to disable a video clip but, at the same time, want to keep its audio clip active.
Hit the ‘Linked Selection’ icon to disable all linking, and now disable the video track (right-click/’Enable’)

Why use ‘Enable’ rather than the lock or the Eye icon?
With ‘Enable’, instead of neutralising an entire track, you target one or more clips.

52
Q

Audio
remove pesky channel on a single track
METHOD 1/2 - keeping the stereo configuration

A

In the Project Panel,

  1. right-click the source file / Modify / Audio Channels
  2. Dialog pops up - check att
53
Q

Audio
remove pesky channel on a single track
METHOD 2/2 - single mono

A
  1. right-click source file in Project Panel
    1. Modify / Audio Channels - dialog pops up
  2. Change ‘Clip Channel Format setting from the default ‘Stereo’ to ‘Mono’
  3. you are going for mono, and you are getting rid of one channel, and so, in ‘Number of Audio Clips’ you want to see ‘1’ (you can indeed have dual mono)
  4. in the attached screengrab, the left channel is ticked - because in this instance, the right channel was the one to get rid of
54
Q

Audio
At how many decibels (dB) should the human voice peak for overall voice sound to be right?
NOTE!‘peak’ here does not refer to shouting; it means those places in someone’s speech where there voice goes up emphasis-wise, stress-point wise. So a person’s speech peaks quite often.

A

minus 12 dB
minus 6 dB at most

(when you can, read up on dB levels theory, notably to find out about other such acceptable levels for different kinds of sounds (score, ambient noise…)

55
Q

Audio
gain & volume - what’s the difference?

A

gain is input
you adjust the level across a clip or an entire sequence
select clip or sequence and hit G for ‘Audio Gain’ dialog.

volume is output
you adjust the level of individual clips

56
Q

Audio
you’ve found out that the sound level of an entire bin of audio clips is either too high or too low; change the gain of these audio clips in one fell swoop - how?

A
  1. in the Project Panel, select the bin
  2. hit G
  3. dial in the new gain
57
Q

Audio
How to evaluate the audio levels in a clip or segment of a clip?

A
  1. set an In and an Out
  2. click the wrench icon in the Program Monitor - in the dropdown, select ‘Loop’

the keyboard shortcut is Ctrl + L

58
Q

Audio
What’s an audio keyframe and how do you create one?

A

When you Ctrl+click on the white horizontal line in the middle of an audio clip, a white dot appears: an audio keyframe.
Drag it up or down the vary the volume.

To vary the volume of a specific segment of the clip, Ctrl+click on the spot where you want the volume to start going up or down; then, create a second dot and drag it up or down - with that second keyframe selected, you can also hit either [ or ] to lower or increase the volume.

59
Q

Audio Cross Dissolve
What does it do? How?

A

It smoothens the transition from one audio clip to the next.

  1. place the cursor on the starting point of the second track
  2. Hit Ctrl+Shift+D
  3. a greyed-out area now straddles the right end of the first clip and the left end of the right clip (see pic)
    1. You can narrow or widen the width of the ACD by dragging either end.
60
Q

What is ducking?
How do you implement it?

A

Ducking is, in most cases, reducing the sound level of the music track when dialogue is active. It is automated keyframing.
The Essential Sound panel is a quick and easy way to implement ducking: dialogue and music tracks are confirmed as such in the panel. Dialogue and Music have their respective sub-panels for tweaking.

61
Q

Audio ducking example
‘Music’ against ‘Dialogue’

A

The attached image shows both the initial ‘Essential Sound’ dialog and the box after tracks have been tagged and the ‘Music’ track is selected for treatment.
The initial panel is where you assign properties for your different types of audio track: ‘Music’, ‘Dialogue’, ‘Ambience’, ‘SFX’.
(select one track and hit the relevant category)
Having tagged all your audio tracks, when you select the music track again, the ‘Essential Sound’ dialog automatically displays the ‘Music’ section.
Now you tick ‘Ducking’ and, at ‘Duck against’, you tick the speech bubble to duck the ‘Music’ track against ‘Dialogue’ track.
Verify your music track: you’ll find that Pr has automatically created keyframes in the music track, lowering the volumes in those places where the ‘Dialogue’ is active.

62
Q

Given a video track married to an audio track:

  1. How do you know the two tracks are out of sync?
  2. How do you fix the issue?
A
  1. red and white icons appear at the start of the tracks
  2. how to fix: right-click an alert and
    1. METHOD 1/2
        • if the clips have room to move, then go for ‘Move to Sync’.
    2. METHOD 2/2
      1. if the clips are locked tight in a sequence, then go for ‘Slip into sync’.

NOTE: if you manually desync tracks, Pr does not alert you to it, assuming, as it does, that this was your intent. If you want Pr to alert you about manual desyncs, go to Preferences / Time - and tick ‘Display out of sync indicators for unlinked clips’.

63
Q

Say the audio native to your video clip is poor, but you do have a separate, high quality audio track - how do you replace the bad with the good?

A

See attached pic.
Given a video track with poor audio and an audio track with quality audio, here’s the quick and dirty method to add the external, good quality audio to the video, dumping the poor audio track on AV track:

  1. Select both of them in the Project panel
  2. Right-click and select ‘Merge Clips’ in the dropdown menu
  3. In the dialog, select ‘Audio’ and leave ‘Track Channel’ to default 1 if using the default dialog track.
  4. Tick ‘Remove Audio From AV Clip’ - doing so, you instruct Pr to overwrite the poor audio in the video track with the standalone, quality audio track.

NOTE: in the project panel, the AV track is, apparently, duplicated, but the name of the new track is suffixed with ‘-Merged’. so the original clip, with the bad audio is kept, and added to the listing is a copy, the upgraded AV track, with the now integrated quality audio.

64
Q

In / Out
add an In/Out to a clip or still on the Timeline
ONE SINGLE KEY !!!

A
  1. SELECT CLIP/STILL
  2. HIT X
65
Q

Stills - setting things up, what do you do?

A

Even before you import stills into your Timeline, you need to import a
clip into the Timeline, that has the specs you want to apply to your project.
Doing so, sends the message to Pr that you want to use that video’s’ specs. You can delete the video clip immediately, as Pr will retain its specs.

  • Preferences / Timeline
    • ‘Still Image Default Duration’ - the default unit is ‘Frames’, which you can set to ‘Seconds’. The default number of frames is 150

NOTE:
As you know, the frame rate varies from one video to another, and so, if your still image duration is expressed in frames, its actual duration will be conditioned by the frame rate:

In a 24 frames/sec project still image duration = 6¼ seconds
In a 30 frames/sec project still image duration = 5 seconds
You can, of course, vary an image’s duration on the Timeline.

66
Q

Stills -
given a still on the Timeline and in the Program Monitor, how do you add effects such as ‘Motion’ (Position, Scale), ‘Rotation’, ‘Opacity’ to the image?

A

In the Source Monitor, look for the tab called ‘Effect Controls’.

It is quite critical to work with very large images, as they give you more creative latitude. You can, notably, zoom in quite a bit, without losing definition.

67
Q

Stills -
Given a very large still on the Timeline - its preview in the Program Monitor is only going to show a fraction of that still, surrounded by black space, then the blue boundary, which represents the size of the project (e.g. 1920x100).
How do you, in one single move, set that very large image to the frame size (the size of the project)?

A

On the Timeline,
right-click the still,
in the drop-down,
select ‘Set to Frame Size’

NOTE:
In ‘Effect Controls’, you may need to reset the positioning of the still, which may display off-centre is you have been moving it around.

68
Q

Stills -
In the Program Monitor, how do you know the preview of a still fits the specs of the video precisely?

A

When you x2-click the preview, a blue frame appears around the image. If the blue frame hugs the image, without any black (default colour) margins, then the image is exactly the same size as the video (1920x1080 etc.).

69
Q

Stills -
In the Program Monitor, how do you know an image’s specs are greater than the sequence’s?

A

When you x2-click the image, a blue boundary appears.
If there is black space between the image and the blue boundary, then the image’s specs are greater than the sequence’s.
Black space between image and blue frame may be just black lateral margins (pic wider that vid), black height margins (pic is higher than vid).
And of course, there may be black space all around, when pic exceeds size of video in both width and height.

NOTE: WHEN YOU DRAG THE BOUNDARIES OF THE BLUE FRAME, YOU VARY THE SIZE OF THE PREVIEW. IN THE CASE OF A SUPER LARGE IMAGE, THIS ALLOWS YOU TO ACTUALLY DISPLAY PRETTY MUCH THE ENTIRE IMAGE, EVEN IF ITS ORIGINAL SIZE IS GREATER THAN THE SEQUENCE’S BOUNDARIES.

70
Q

Stills -
preview in Program Monitor and Effect Controls
- just take a look at this screenshot, with legends,
to familiarise yourself with the environment.

A
71
Q

Stills -
top and tail editing - what is it?

A

On the Timeline, you’re lopping off some of the front end or the back end of a still

How to:

  1. place the playhead where you want the lopping off to take place
  2. to lop off the front end, hit Q - top editing is the name
  3. to lop of the back end, hit W - tail editing is the name

A typical context for top and/or tail editing is when, having a music track to accompany your slideshow, you cut the individual stills to the beat.

72
Q

Stills -
the black of pillar boxing is actually…transparent:
play a sequence segment where a still with pillar boxing acts as B-roll and, sure enough, the A-roll will show in lieu of the pillars.
How do you add a matte (pronounce mat), making the pillars actually black - or any colour you choose, for that matter?

A
  1. In the project panel, bottom right, click new item icon
  2. selects ‘Color Matte…’
  3. a first, small, dialog presents video settings, that displays the project settings – just click OK
  4. a second dialog pops up, the one in which you will set the colour to fill the columns – set your colour and click OK
  5. a third dialog pops up, where you only add a name to your background. As soon as that’s done, the background is listed as an item in the project panel.
  6. in the Timeline, move your still one level up from default B-roll track and then drag your background in-between the still and the A-roll
  7. make the background fit the exact footage of the still
73
Q

Stills -
set up a sequence
You have dragged a range of stills onto the Timeline.
They vary in size.
What do you do in relation to frame size?
How to you batch-adjust the stills’ duration?

A

SET TO FRAME SIZE

  1. select all on the Timeline
  2. right-click / Set to Frame Size

BATCH-ADJUST DURATION

  1. select all
  2. Ctrl + R = ‘Clip Speed / Duration’ dialog
  3. scrub over blue digits or click and type
  4. Makes sure that ‘Ripple Edit, Shifting Trailing Clips’ is ticked
    • If it were not, we’d end up with gaps between stills on the Timeline
74
Q

Stills -
‘Brady Bunch’ effect - how?

For the sake of illustration, 10 very short clips (looking like stills) sequentially placed on the same track in the Timeline are made to appear one after another on a (default) black canvas. They are to appear one after another, starting from top left, left to right, on several rows.

A
  1. select the second to last clips in the sequence and hit Alt + Up arrow - you can drag up manually but the shorcut is more precise/reliable
  2. repeat until all clips are on a different track - left-hand side of image
  3. drag the end bit of all tracks to coincide with the end bit of the top one - right-hand side of image
  4. Now scale the first clip in Effect Controls and Program Monitor. For positioning, you can drag the scaled clip to the top left of the canvas - for precision positioning, just figure out the maths.
    1. you can copy/paste the attributes of one clip to the next and tweak the difference as required.

NOTE
Such a series of effects is resource-hungry, and when you play back your work, frames are likely to be dropped. To avoid this:

  1. create an In/Out around the sequence in the Timeline
  2. Sequence / ‘Render In to Out’
75
Q

Stills -
a composite effect can be power-hungry and, when previewed (played) in the Program Monitor, may drop frames - what do you do to produce a preview that displays without any glitches and how do you do it?

A

you render the section in the Timeline that is the collection of effects. rendering delivers the end product, the appearance, leaving out all the power-hungry coding, and so, being much lighter, will play without glitches.

HOW:

  1. in the Timeline, frame the effects with an In/Out
  2. In the menu: ‘Sequence’ / ‘Render In to Out’, and a dialog pops up, showing the rendering progress
76
Q

transition effects -
name two common ones
What are the shortcuts?

A

dissolve
morph cut (used to smooth out jump cuts)
The shortcut is Shift+D
to apply to either video or audio track its Ctrl+D

77
Q

transition effects -
search for - how

A
  1. In Project Panel, select ‘Effects’ tab
  2. in search box, dial in ‘cross
  3. a listing of video and audio transitions are listed

NOTE:

that you can set one type of transition as your default, simply by right-clicking it and selecting ‘Set Selected as Default Transition’.

78
Q

Sequence Settings
How do you access them?

A

Menu:
Sequence / ‘Sequence Settings…’

79
Q

video effects -
how to implement an effect? [B&W, tint etc.]
(quick and dirty)

A
  1. in the Project Panel, select the ‘Effects’ tab
  2. use the search box to locate the desired effect
  3. drag the effect onto the clip in the Timeline
  4. Done!

NOTE:

  1. good workflow habit is to display ‘Effect Controls’ in the Source Monitor as part of the procedure. As soon as you drop the effect onto the clip in the Timeline, the effect becomes listed in ‘Effect Controls’.
  2. you may wish to load an effect, to implement later; in this case, you can drag the effect from the ‘Effects’ tab in the Project Panel and into the ‘Effect Controls’ tab in the Source Monitor.
80
Q

video effects -
when tweaking is needed.
Some effects are not content with just being dragged onto a clip in the Timeline - they’ll need, say, specs to be dialled in in the ‘Effect Controls’ tab in the Source Monitor.

Example: tint - how do you make it happen?

A
  1. first of all, for pure tint, you need to first convert the clip to B&W by dragging that effect onto the clip.
    1. this is NOT sine qua non - applying tint on colour works fine; it just looks different
  2. now ‘map’ the white to the required colour
  3. DONE!
81
Q

video effects -
applying a blur using a defined area (‘Mask’) - ellipse, rectangle or pen tool are the options.
Say you want the blurring around the mask, not inside - how do you do it?

A

you will have imported a blur effect into the ‘Effect Controls’ tab of the Source Monitor - coming from the ‘Effects’ tab in the Project Panel - and applied some blurring under the ‘Blurriness’ command of the effect.
you will also have drawn a shape in the preview in the Program Monitor.

the blur is inside the shape by default - to apply the blur outside the shape, under the blur effect, go to:
/ Mask / Mask Expansion - and tick ‘Inverted’.

82
Q

video effects -
Apply one or more of the video effects from one clip to one or more other clips
METHOD 1 / 2 - working on the Timeline

A
  1. click the clip with the effects
  2. Ctrl-select the effects in the ‘Effect Controls’ tab of the Source Monitor
    1. THEY MUST BE SELECTED IN THE LISTED ORDER !!!
  3. select the clip(s) you want to apply the effect(s) to
    1. OPTIONAL: also place the playhead on one of them, because you’ll get an immediate preview in the Program Monitor, showing how the effect(s) pan out
  4. Ctrl+Paste
  5. DONE!!!
83
Q

video effects -
Apply one or more of the video effects from one clip to one or more other clips
METHOD 2 / 2 - working with ‘Paste Attributes’ dialog

A
  1. On the Timeline, select the clip with the effects
    1. Ctrl + C
  2. Select the clip(s) you want to apply the effects to
  3. Edit (main menu) / ‘Paste Attributes…’ (Ctrl + Alt + V)
  4. dialog pops up
    1. The dialog lists the effects and you can choose which ones to apply.
84
Q

video effects -
create a preset from a set of effects - how?

A
  1. In the ‘Effect Controls’ tab of the Source Monitor select the effects destined to made into one preset
  2. Right-click + ‘Save Preset…’ – dialog pops up
  3. Name your preset – this is critical to later ID your preset in the listing of ‘Presets’ in the ‘Effects’ tab of the Project Panel. choose short + mnemonic name
  4. Select clips to which apply the preset
  5. ID your preset in the presets listing + drag and drop it over selected clips
85
Q

video effects -
adjustment layer - create - how?

What are the advantages?

A
  1. Select sequence folder in Project Panel+click ‘New Item’ icon+select ‘Adjustment Layer…’ – ‘Adjustment Layer’ appears in the folder
  2. Drag adjustment layer onto the track above the track to modify.
  3. In ‘Effect Controls’, select your effects & Ctrl+cop
    1. Select adjustment layer+paste

ADVANTAGES
ALs can modify all or part of an entire track
given an AL with one one or multiple effects, you can modify one effect and the entire AL is updated. Also, sitting on its own track, an AL can be disabled at will.

86
Q

video - effects -
How do you add a second adjustment layer to a sequence?

A

You don’t create a new one (as in, ‘New Item’);
you drag the existing blank in the sequence’s folder in the Project Panel onto the track above the one where there’s already an AL with effects in it.
Then, in the ‘Effect Controls’ tab of the Source Monitor, you create the effects for that second AL.

NOTE:
As stated above, the AL listed in the sequence’s folder is a BLANK, and remains so even after you have created effects in the first AL on the Timeline, and so you can keep on dragging that blank onto the Timeline, on different tracks - or onto another time period on the same track.
And so, each time you drag another copy of the blank in the Project Panel onto the Timeline, when you go to the ‘Effect Controls’ tab in the Source Monitor, no effects are listed; you got a blank slate!

87
Q

video effects -

Apply effects to Master clip so that the segments created from it be upgraded with those effects, in one fell swoop. How?

A

The ‘Effect Controls’ tab in the Source Monitor has got two tabs of its own:

  1. the default, to the right, where you view the effects applied to a clip obtained by creating an In/Out in the Master and dragging that selection into the Timeline panel.
  2. the other, to its left, references the actual master

Into the ‘Master’ tab you can drag any effects, and they will apply instantly to every single clip on the Timeline that is derived from that master. Note!!! - in the Timeline, every affected clip is now prefixed ‘fx’, underlined in red.

88
Q

rendering
What visual cue in the Timeline alerts you that one segment is likely to drop frames in a preview?

A

in the actual timeline of the Timeline panel, a coloured line displays - yellow and red.
The red bits are likely not to play seamlessly.

89
Q

rendering
‘Dropped Frame Indicator’

A

The clue as to whether a RAM-hungry sequence will preview without dropping frames is, if there is a potential issue, for the timeline to display a yellow and red line - red meaning that frames are likely to get dropped.
Taking your diagnostics forward, you click the wrench icon in the Program Monitor and select ‘Dropped Frame Indicator’ -
see the dual image, attached for details.
Hovering your cursor over the now yellow dot, an info blurb pops up and, in the above case, no less than 80 frames were dropped!
Bottom right of the preview in the Program Monitor, we have the ‘Playback Resolution’, In the image on the right, it is set at ¼ the normal speed, yet still frames were dropped!
Drop the resolution to 1/8 or even 1/16 to try and obtain a preview without frame dropping.

90
Q

rendering
How do you render with menu options?
Clue: you can simply render selected clips or you can frame the clips with an In/Out…

A

Select a section that has a red line above it and, in the menu: Sequence / ‘Render Selection’.
As often as not, you’ll want frame the problem clips with In/Out points and then render.
Using In/Out, you now have two options in the menu:
‘Render Effects In to Out’
Will only render parts of the sequence that have a red line. The image on the right, shows rendering in progress using ‘Render Effects In to Out’.
‘Render In to Out’
This renders everything that’s selected, including materials under the yellow line in the Time Ruler.
However, it’s usually unnecessary to render the yellow portions, because Pr will play those sections anyway!

NOTE: TO DELETE RENDER FILES, GO TO MENU:
Sequence / ‘Delete Render Files’

91
Q
freeze frames (basic) how?
***First, tell us what they are, then only how to create them.***
A

a clip in a sequence in the Timeline is selected and one frame in that clip is chosen for the entire clip to become that frame - in other words, you are left with a still that has the same duration as the clip it was created from.

HOW:

  1. park playhead over the frame that is to replace the clip
  2. right-click and select ‘Frame Hold Options…’
  3. in dialog, with ‘Hold On’ ticked, select ‘Playhead’ in dropdown
  4. OK
92
Q

freeze frames -
How do you edit them?

A
  1. right-click the freeze frame in the Timeline (do you remember that the freeze frame was created from a frame in a clip?) and select ‘Frame Hold Options’
    1. untick ‘Hold On’ and the still is back to being the original clip
  2. place playhead over alternative frame
  3. right-click again and select ‘Frame Hold Options’ again
  4. making sure ‘Hold On’ is ticked, select ‘Playhead’ in dropdown.
93
Q

freeze frames-partial
what are they and how do you create them?

A

A standard freeze frame is a still created from a frame in a clip and of the exact same duration as the said clip.
You can create a partial freeze frame, where the clip runs and then freezes at a given frame and then resumes its normal course.

HOW:

  1. playhead is parked over frame where freeze is to start
  2. right-click clip and select ‘Add Frame Hold’
  3. done

NOTE HOW IN A PARTIAL FREEZE FRAME THE CLIP GETS CUT INTO TWO PARTS, AT THE POINT WHERE THE FREEZE FRAME STARTS.

94
Q

freeze frames-mini-
What are they and how do you create them?

A

Mini freeze frames are moments in a clip where one frame is frozen for a moment, only for the clip to resume when it ends. One way of using mini freeze frames is sync them with a musics tempo.
HOW:

  1. lock all tracks except the one you’re working on
    1. see screengrab to see what happens if you don’t
  2. With the playhead on the frame to freeze…
  3. …right-click the clip
  4. …in dropdown, select ‘Insert Frame Hold Segment’

As often as not, the create mini freeze frame segment will be too long - Ctrl-drag (Ripple Edit Tool) to shorten it.

95
Q

fit to fill -
what is it an how do you do it?

A

a video clip was previously trimmed in the Source Monitor and the segment migrated to the Timeline. In the Source Monitor, you have now widened that segment, moving either or both the In and the Out, and you’re looking at shoehorning this longer segment into the duration space of the existing segment in the Timeline. With a greater number of frames, the shoehorned segment can only play at a greater speed, with the visuals moving as in an old silent movie.
HOW:

  1. First, ‘match-frame’ the Timeline clip to the Source Monitor - ‘F’ key.
  2. Edit the In and/or Out in the Source Monitor as required
    1. the longer the new edit, the faster the playback will be
  3. With existing Ins and Outs for both clips, we hit the ‘Overwrite’ icon (or the period key)
  4. ‘Fit Clip’ dialog pops up and we select ‘Change Clip Speed’
96
Q

export a frame - how?

A

You can do this both in the Timeline and in the Source Monitor panels.

  1. Park the playhead over the frame to export
  2. Ctrl + Shift + E – summons the ‘Export Frame’ dialog
    • Choose a format + an export destination + OK
97
Q

color correction -

  • what are video scopes?
  • how do you display them?
A
  • They’re colour correction tools.
  • Window / Lumetri* Scopes

* Lumetri
The Lumetri Color toolset is Premiere’s colour correction tool.
Do search for ‘color’ in the Effects tab of the Project panel to appreciate the huge range of colour tools.

98
Q

color correction -
what is the value of
video black?
video white?

A

video black = 0
video white = 100

99
Q

color correction -
Vectorscope (YUV):

  1. How does the graphic look?
  2. What does it measure?
  3. Which values are nearer the centre?
  4. Which values are nearer the periphery?
  5. How many settings are there for Vectorscope?
  6. Where are fleshtones located on the graph?
A
  1. The graphic is circular.
  2. It measures colour values - saturation + or -
  3. at centre colours are desaturated
  4. at periphery colours are richly saturated
  5. just two - YUV and HLS
  6. the diagonal that goes from top left to bottom right is called the fleshtone line
    1. looking at the graph here, we can see that the image appears as a white cloud, just above the centre, and sitting between yellow and red. in this case, the image is leaning toward the yellow, and this would translate into an image with a yellow cast
100
Q

color correction -
What is the order of the workflow?

A
  1. Waveform (Luma) – shadows, mid-tones and highlights, colours excluded.
    • Are dark and black values above 0? If so, they need tweaking
    • Light values should tend toward value 100
    • Mid-tones – which include skin tones – sit around the equator
  2. Parade (RGB) – we colour-balance the channels – shadows and highlights should be colour-neutral.
  3. Vectorscope (YUV) - Hue-Saturation adjustments
    • Fleshtones – are they aligned to the fleshtone line?
    • Do we have the right saturation for colour?
101
Q

colour correction -
Vectorscope (YUV)

What is it?
What does it look like?

A

What it is:
It displays colour values, i.e. degrees of saturation; values near the centre are very desaturated; those at the periphery super saturated.

What it looks like:
it’s a ‘polar’ diagram: a circle.

102
Q

colour correction -
tweaking dark value is called?

A

setting the black point
Indeed, tweaking the highlights is called
setting the white point

103
Q

colour correction -
using the Curves function in Lumetri Color panel to set the Black and White points

A
  1. select the White radio button at the top of the curves graph
    1. this white button stands for B&W
    2. bottom left end of the diagonal is the black point - drag it to the right to darken shadows.
    3. top right end of the diagonal is the white point - drag it to the left to increase exposure
  2. go back to LESSON 12.04 TO COMPLETE THIS CARD, BY ADDING HOW TO TWEAK FLESH TONES
104
Q

colour correction -
What is the technical term for the action of dragging down shadows to the zero value?

A

setting the black point

Indeed, mapping the highlight values to 100 is called
setting the white point.

Also, for reference, the bottom left corner and the top right corne in the Curves graph are respectively called the black point and the white point.

105
Q

colour correction -
Lumetri Color panel: how do you toggle before and after view?

A

you click fx, which is listed at the top of the panel

106
Q

colour correction -
Shadows, Midtones and Highlights all together as known as?

A

tonal range

107
Q

Colour correction -
what do you do it with?
what are the three views?

A

Colour correction is carried out with videoscopes,
of which there are three:

  • Waveform (Luma) for light and dark parts
  • Parade (RGB )
  • Vectorscope (YUV) for hue and saturation

(the attributes in parentheses are variables)

108
Q

Videoscopes -
reading the Vectorscope information:
difference between centre and periphery?

A

The nearer to the centre the white blob, the more desaturated the colours; the nearer to the periphery, the more saturated.

109
Q

Video scopes workflow ?

A
  • Waveform (Luma
    • shadows, midtones, highlights
  • Parade (RGB)
    • to ‘colour-balance’ the RGB channels
  • Vectorscope (YUV)
    • to fix Hue and Saturation - notably for fleshtones
110
Q

Colour correction -
the ‘Curves’ tools in the ‘Lumetri Color’ panel
How do you read/use the graph?

A
111
Q

Colour correction -
Shadows and Highlights must be set to 0 and 100 respectively.
What is the trades’ name for these tweaks?

A

setting the black point
setting the white point
Remember! in your colour correction workflow, this procedure should be the first one. (do you remember the other two, in the right order?)

112
Q

colour correction -
‘Waveform (Luma)’
What is it?
What does it look like?

A

What it is:
The Luma setting excludes colour, as its function is to troubleshoot shadows, midtones (which include skin tones) and highlights.

What it looks like:
The complex waveform - a graphical rendering of the image - is made up of a very large number of white(ish) lines; scrubbing the playhead animates those lines that represent the bits in the clip that are moving, allowing you to ID those bits you want to tweak. This applies to the other wave graphics as well, such as Parade (RGB).

  • Black elements should be at value ZERO
  • White elements should be at value 100
  • Flesh tone elements should be between 65 and 75
113
Q

colour correction -
‘Parade (RGB)’
What is it?
What does it look like?

A

What it is:
RGB - red, green, blue - the three colours in digital video from which all other colours derive. In this panel, you ‘colour-balance’ each of these thrree ‘channels’.

What it looks like:
Three complex waveforms sit side and side and in this order - RGB.

114
Q

colour correction -

Rectifying a colour cast - in the Parade (RGB) panel, what is the clue as to the cause of the colour cast?

What colour cast do you get when the Red or the Green or the Blue are deficient?

A

Red Green Blue waveforms should co-exist at the same levels. When a waveform is lower than the other two, that waveform is the cause of the imbalance, the colour cast.

  • Red deficiency results in a cyan cast
  • Green deficiency results in a magenta cast
  • Blue deficiency results in a yellow cast

NOTE: CYAN, MAGENTA AND YELLOW ARE SECONDARY COLOURS TO RED, GREEN AND BLUE

115
Q

colour correction -
Hue Saturation Curves:
How do you increase/reduce global saturation?

A

In the Lumetri Color panel*, scroll down to ‘Hue Saturation Curves’

You drag the white line inward for less saturation; outward for more.

* If the panel isn’t displaying, go to the menu and click ‘Window’; in the dropdown, select ‘Lumetri Color’.

116
Q

colour correction -
Hue Saturation Curves -
How to vary the saturation of one colour?

A

In the Lumetri Color panel*, scroll down to ‘Hue Saturation Curves’.

  1. click on the white line to create a point, then a second - the two points to frame the range of colour whose saturation you want to vary
  2. exactly between the two points, create a third one
  3. now drag that middle point outward or inward to vary the saturation (outward for more; inward for less).

* If the panel isn’t displaying, go to the menu and click ‘Window’; in the dropdown, select ‘Lumetri Color’.

117
Q

colour correction -
Hue Saturation Curves:
How do you delete a point on the white line in the rainbow doughnut diagram?

A

Ctrl + click

118
Q

Titles -
How to create a basic title?

A
  1. Timeline is selected
  2. menu: Graphics / New Layer / Text
    1. element appears on lowest available video track
  3. in the Effect Controls tab of the Source Panel has appeared:
    1. effect is now listed as: Text (New Text Layer)
      1. the effect has two sub-sections:
        1. ‘Source Text’ - to edit the text
        2. ‘Transform’ - to apply effects to the text
  • You can repeat the Graphics/New Layer/Text command to add more text boxes in the Program Monitor.
  • To add graphics use the command: Graphics/New Layer and select either ‘Rectangle’ or ‘Ellipse’ - or select ‘From File…’ to import a graphic
119
Q

Titles -
keyframing

A

with a title in the Program Monitor,

  1. Set a ‘Position’ keyframe and drag your title off-screen, scrubbing the blue digits to the left (automatically creates a diamond icon on Effects playhead)
  2. Place the play-head where you want the title to appear
    • Scrubbing the blue digits to the right, bring the title on-screen (automatically creates a diamond icon on Effects playhead)
  3. Now place the play-head a bit further and add another keyframe – a ‘Hold’ keyframe, one that sustains the visibility of the title…
  4. Finally, yet further down, place the play-head where you want the title to disappear and drag the title off-screen
120
Q

Titles-
how to re-use?

A

In Premiere, master graphics for titles must be created manually:

  1. Title ‘clip’ is selected in the Timeline
  2. In the menu: Graphics / Upgrade to Master Graphic
    • Check the listing in the Project Panel:
      • a ‘Graphic’ is now listed and the square next to it is purple.
    • Check Effect Controls in the Source Monitor:
      • There’s now a second tab, called ‘Master Graphic’ – that’s where you need to go to change any settings.
  3. You may consider cloning your master graphic and give a back-up name to the clone – the clone can be used to create an alternative version of the title – for instance without graphics – and used elsewhere in the sequence.
121
Q

Titles
Graphics Titler - how to summon it?

A

in the menu:
Graphics / New Layer / Text

122
Q

Titles-
Essential Graphics panel - what is it?

A

Menu / Window / Essential Graphics

the Essential Graphics panel sports most of the functions you can see in the Effect Controls tab of the Source Monitor.

Three views are shown in the screengrabs: the first and second show that an effect needs to be selected for commands to be displayed; the third screengrab shows a listing of templates, revealed when you first click ‘Browse’, then carry out a search in the search box.

Perhaps the most salient difference is the ‘Browse’ tab, which is your gateway to collections of templates for various titles. For instance, several ‘lower third’ titles are available.

123
Q

Titles-
lower third - what is it?

A

Lower third is video editing jargon for a blurb, usually with a graphic background, near the bottom of the screen. A typical example of lower third content is the name and role of a speaker currently displayed.

124
Q

Titles-
Essential Graphics panel - how do you open it?

A

Menu / Window / Essential Graphics

125
Q

keyframing -
what do you call a keyframe that maintains the existing value of the initial keyframe?

A

a hold keyframe

126
Q

Keyframing -
What’s the keyboard shortcut to lower or increase the volume?

A

[or]

127
Q

keyframing -
At what value do you set the ‘Mosaic’ effect’s horizontal and vertical values to cancel the effect altogether?

A

500

128
Q

keyframing -
At what setting is the ‘Posterize’ effect cancelled out?

A

20

129
Q

subclips - restricted and unrestricted
How do you create them?
What’s the difference?

A

By default, when you redefine an In and/or an Out, the original is/are deleted, but there’s a way to keep your existing In/Out
Command

  1. in main menu, click the ‘Clip’ menu + ‘Make Subclip…’
  2. In the dialog, you have the option to either leave the clip unrestricted or to restrict it.
    Unrestricted mean that you can push back the boundaries of your In/Out segment, to incorporate footage from the HANDLES on either side of your In/Out segment.

What does that mean? restricted means you can only edit within the confines of your In/Out boundaries. In other words, the only action available to you is clipping your In/Out segment.

130
Q

Source Monitor to Timeline:
Shortcut key?

A

comma

131
Q

What would make importing video or audio into the timeline impossible?

A

The absence of pre-existing set-up. If the timeline is blank, i.e. with not even a blank sequence, then you can’t import anything from either the Project Panel or the Source Monitor.

132
Q

Where can you, swiftly, establish what the peak amplitude of an audio track is?

A

at the bottom of the ‘Audio Gain…’ dialog.

right-click the audio track and select ‘Audio Gain…’ or hit the G key

133
Q

Adjusting a entire audio track, as against just one or more audio clips on that track, is called doing…

A

a baseline adjustment

134
Q

How to vary the volume of an audio clip 1dB at a time?

A

With the audio clip selected
click either [or]
Holding down Shift varies the volume 3dB at a time.
Note that varying by 3dB increases or decreases volume by half.
Also, it does not matter whether the audio clip is linked or not to its video track.

135
Q

Where is the Audio Clip Mixer?

A

in the Source Panel.
It’s one of the tabs, top.

136
Q

Audio Cross Dissolve - what is it?
How to?

A

Given two adjacent audio clips on the timeline, your intent is to smooth over any sharp volume contrast between the two.
How to:
place cursor at start of right-hand side clip; when red bracket appears, simply click.
Now: Ctrl + Shift + D
This creates a shaded area (your ACD) that spans the two adjacent clips. Widen or shorten the ACD by dragging either end of the shaded area.

137
Q

Adding a keyframe to an audio clip
How?

A

First of all, your audio clip should display a white line in the middle of it (stretch it vertically if it doesn’t).
Now Ctrl + Click on the white line.
You’ll need at least two keyframes to vary a segment of the clip rather the entire clip.

138
Q
  1. Why sync the audio of two AV tracks?
  2. How do you sync the audio of two AV tracks?

(shooting the same scene from differing distances/angles)

A
  1. to make the sound consistent across the two AV tracks, as well as to secure the best sound, by applying the sound of the AV track with the best audio to both AV tracks.
  2. in the Project panel, select the 2 tracks
    1. right-click and in the dropdown…
    2. …select ‘Create Multi-Camera Source Sequence’
    3. quick & dirty way is to select ‘Audio’, which does the job automatically. It’s very safe because Pr matches the 2 audios perfectly.

‘Camera 1’ (see pic) is whichever track you select first when selecting your two AV tracks. Make sure that ‘Camera 1’ is the track with the best audio - Pr selects the track of ‘Camera 1’ for syncing, i.e. allocating the same audio track to the pair of AV tracks to sync.

139
Q

Create a sequence of a multicam clip
- how?

A

in Project Panel,
right-click the multicam clip
and select ‘New Sequence From Clip’ in the dropdown.

140
Q

multicam sequence:
How do you create a finalised multicam sequence?
You previously converted a multicam clip in the Project Panel into a sequence in the Timeline by right-clicking it and selecting ‘New Sequence From Clip’ in the dropdown.
Now, you need to assign sections of the sequence to, say, Cam 1, others to Cam 2.
(the assumption is that you only have two cams in this instance)

A

The process is incredibly simple:

  • In the Program Monitor, your two cams are displayed because you clicked the multicam editing button
  • start playing the multicam sequence in the Timeline: the two cams play in sync
  • now, you simply click on the cam that you want to display from one place on the timeline to another. Want to switch to the other? Duh! click on the other! super easy!

For learners looking at this flashcard, and to repeat what I state on the ‘question’ side, in this instance there are two cams, but there could be more.
Also: in the attached pic, there seem to be 3 pictures when there are only 2 cams. The two small pics are the actual cams, the larger one, on the right, is the leftmost cam, magnified, because that cam is currently selected!

141
Q

How do you split a Cam segment in a multicam sequence on the Timeline?

A

Let’s assume you have two cams, by default called A Cam and B Cam by Premiere Pro CC, and you want to split an A Cam segment in the timeline into two segments, one A Cam, the other one B Cam.

  • place the playhead on the spot where you want to split the Cam 1 segment
  • Hit Ctrl + 2 and it’s done
    • 2 means B Cam.
      • A Cam is 1; B Cam is 2
142
Q

How to change the specs of a sequence?

A
  1. right-click the sequence in the Project Panel
  2. in the dropdown, select ‘Sequence Settings’
143
Q

migrating only the video or only the audio from the Source Panel to the Timeline how?

A

drag either of the two icons just under the preview in Source panel

144
Q

Move one clip in a sequence - how?

A

Ctrl+drag
Visually, as you start dragging the shot, a vertical line with white triangles will
appear at its left end, whether dragging to the left or to the right.

145
Q

Timeline - remove stuff from -
What are the two types of removal?

What are the keyboard shortcuts?

A
  • *LIFT** and EXTRACT
  • A lift leaves a gap, an extract doesn’t.*

keyboard shortcuts:
LIFT: COLON (leaves a gap)
EXTRACT: APOSTROPHE (closes the gap)

146
Q

track selectors - what are they?

A

See attached pic…
When you use the keyboard shortcut to migrate a clip from the Source Monitor to the Timeline, the right track needs to be selected - you don’t want B-roll to land on the A-roll track.
Track selectors are the guys to mobilise.

147
Q

What is the technical term for the opening shot of a docu/film?

A

the establishing shot

148
Q

What is rack focus?

A

Rack focus is when the focus moves from one plane to another.

149
Q

Given two, adjacent shots in the Timeline;
what is each referred to as?

A

the left shot is called the A-side shot, the right shot is called the B-side shot.

150
Q

Say you are trimming a shot on the Timeline;
You have the yellow bracket of the Ripple Edit tool in its place and you have the playhead on the spot where you want your trim to end.
So what’s the keyboard shorcut to delete the space between yellow bracket and playhead?

A

E

151
Q

Given one shot in the Timeline, what is the keyboard shortcut to display it in the Source Monitor?

A
  • *F**
  • Displaying one given shot in the Source Monitor can be more convenient if the Timeline is crowded.*
152
Q

Create a blank sequence - how?

A

In the Project Panel:

  1. right-click the black space left of the tree of bins
  2. in the dropdown: New Item / Sequence…
  3. ‘New Sequence’ dialog pops up
    1. fill specs as required
153
Q

Given a string of stills of varying sizes on the Timeline,
what command will make all the stills fit in the frame size of the video?

A
  • Selects the stills
  • Right-clicks / Set to Frame Size
154
Q

How do you batch-change the duration of multiple stills on the Timeline?

A
  1. Select the stills
  2. Ctrl + R – summons the ‘Clip Speed / Duration’ dialog
  3. Change duration to whatever
  4. Makes sure that ‘Ripple Edit, Shifting Trailing Clips’ is ticked
    • If it were not, we’d end up with gaps between stills on the Timeline
155
Q

top & tail editing -
What is it and what are the commands?

A

t&t editing is editing stills (probably clips as well?) on the fly on the Timeline.

The commands:

  1. First lock the sound track, to preserve it
  2. Second, the playhead is over a given still
    1. to lop off what’s left of the playhead (the top), hit Q
    2. to lop off what right of the playhead (the tail), hit W
156
Q

Given a clip/still on the Timeline, how do you create an In and Out coinciding with the start and end of the item?
How do you delete the In and Out?

A
  1. Playhead sits on clip
  2. Hit X.

To delete the In/Out, hit Alt + X.

157
Q

Add transition to AV clip - how?
What are the keyboard shortcuts for adding a transition to:

  • just the video clip
  • just the audio clip
A

Click on start of clip

+ Shift + D

+ Ctrl + D

+ Ctrl + Shift + D

NOTE: given a clip that is either video or audio, Shift+D will apply.

158
Q

Morph cuts -
What are they used for?

A

smoothing out jump cuts

159
Q

In the Effect Controls tab of the Source Monitor, how can you vary the duration of a transition in terms of number of frames - say you want the transition to be 20 frames long

A
  1. click on the blue digits of duration
  2. dial number of frames you want.
  3. done.
160
Q

Create a morph cut - how?

A

a standard transition, like Dissolve, is a single step process:
you click on a clip or a cut and apply the effect.

The Morph Cut requires a second step, viz. rendering:

  1. you set an In and Out on either side of the morph cut
  2. in main menu: Sequence / ‘Render Effects In and Out’
  3. DONE!
161
Q

Implement the simple, ‘Black & White’, video effect - how?

A
  1. Place the Playhead over the clip you want to apply the effect to
  2. In the Project Panel, select the ‘Effects’ tab + locate and open the ‘Video Effects’ folder
    • also open the ‘Effect Controls’ tab in the Source Monitor
  3. Scroll down to the ‘Image Control’ subfolder
  4. Select and drag the ‘Black & White’ option and drop it on the clip to modify
  5. The thumbnail image on the ‘Timeline’ and the preview in the ‘Program Monitor’ now display the image in B&W instead of colour

Also, the B&W effect is now listed in the ‘Effect Controls’ tab of the Source Monitor.

162
Q

Apply a simple effect on a clip in the Timeline - how
use the B&W effect as an example.

A
  1. Place Playhead over a clip you want to apply the effect to
  2. In the Project Panel, select the ‘Effects’ tab + use search box to find required effect
    • also open the ‘Effect Controls’ tab in the Source Monitor
  3. Scroll down to ‘Image Control’
  4. Select and drag ‘Black & White and drop on clip to modify
  5. The thumbnail image on the ‘Timeline’ and the preview in the ‘Program Monitor’ now display the image in B&W instead of colour

Also, the B&W effect is now listed in the ‘Effect Controls’ tab of the Source Monitor.

163
Q

Keyframes…
What do you call a keyframe that maintains the value of an effect?

A

a hold keyframe

164
Q

You have a clip in the Source Monitor and you want to go to its listing in the Project Panel - how do you do that so that you gain immediate access?

A

Simple: right-click on the preview in the Source Monitor and, in the dropdown, click ‘Reveal in Project’.

165
Q

Dropped Frame Indicator -
How do you find out the exact number of frames that have been covered?

A

The Dropped Frame Indicator is the green dot, bottom left of the preview in the Program Monitor. When frames have been dropped, it turns yellow.
To find out the number of frames dropped, hover the cursor over the yellow dot - a blurb with the information will pop up.

166
Q

What is fit-to-fill editing?

A

You want to change the In and the Out of a clip that’s already on the Timeline.
So, you send it back to the Source Monitor, by double-clicking and create a new In and new Out.
The procedure requires that both versions of the clip - the one in the Source Monitor as well as the one in the Timeline display an In and an Out.
The way to show an In and an Out for a clip in the Timeline is, with the playhead parked over the clip, to hit the X key
Now, in the Source Monitor you hit the ‘Overwrite’ icon and the ‘Fit Clip’ dialog appears - choose your option and OK.

167
Q

Given a clip in the Timeline,
how do you display an In and an Out for that clip?

A
  1. park the playhead over the clip
  2. hit the X key
  3. done
168
Q

Export a frame, whether in the Source Monitor or in the Timeline:

A

Ctrl + Shift + E
dialog pops up, choose a format, a path and OK.

169
Q

Given a clip in the Timeline,
how do you display its duration?

A

immobilise the cursor over the clip and a legend will pop up with a range of information:

  • file name
  • start and end
  • duration

To display the duration permanently, park the playhead over the clip and hit X - same as for displaying an In/Out for the clip - and the duration will be displayed in large format, bottom right of the Program Monitor.

170
Q

What is the keyboard shortcut to ‘Overwrite’?

A

fullstop key
As seen elsewhere, you could also use the icon in the Source
Monitor - see pic.

171
Q

What is a match frame and how do you perform it?

A

Say you want to expand a clip on the Timeline, by pushing out its In-Out boundaries, but the edit has to fit within the existing duration…
You can still expand it, but by squeezing in the longer duration (Fit-to-Fill) you will accelerate the frame rate.
Select the clip in the Timeline and hit X to display its In-Out points, as we need them for the operation.
Now you perform your match frame: hit the ‘F’ key, to display the clip in the Source Monitor, and there push back the boundaries of your In-Out as required.
Now hit the ‘Period’ key to display the ‘Fit Clip’ dialog and tick ‘Change Clip Speed (Fit to Fill)’ and OK.
So, a match frame is so called because a clip, further shortened or expanded in the Source Monitor, is made to match the one we initially put on the Timeline, and the F key is how you display the clip in the Timeline into the Source Monitor, NOT x2-click.

172
Q

A clip in the Timeline has white triangles at is left and right upper corners - what does it mean?

A

It means this clip is integral, i.e. it does not have handles, as a result from creating an In/Out.

173
Q

A clip on the Timeline is integral, i.e. does not have extra footage to it. How can we stretch or squeeze it?

A

the ‘Rate Stretch’ tool will do the job.
Note that squeezing a clip accelerates the action, stretching it slow down the action. And if the clip has audio, similarly voices will become highpitched on squeezing the clip, lowpitched on stretching it.

174
Q

Exporting a project…
What’s the basic procedure?

A
  1. right-click sequence in Project Panel
    1. select ‘Export Media…’ - dialog pops up
  2. right off the batt, you can keep it super basic by ticking the box of ‘Match Sequence Settings’, and all the other options further down in the dialog are greyed out…
  3. …or you can apply a whole raft of customisations…
  4. ‘Publish’ allows you to post your project to a wide range of online platforms, and you can indeed log into an online account from within the dialog, and when you export, your project will be automatically uploaded.
175
Q

export project…
what’s the shortcut key?

A

Ctrl + M

(‘Export Media…’)

NOTE:

if using using the menu dropdown, you right-click the project’s icon in the Project Panel - be AWARE that ‘Export Media’ is at the very bottom of the dropdown, which may not even show on your screen, requiring you to scroll down to display the command.

176
Q

transcoding formats -
which format is said (course tutor) to be very popular?

A

‘Match Source - Apple ProRes 422’

177
Q

Searching in the Project panel:

  • Results appear as open and closed folders - what are their respective meaning?
  • the folder+magnifier icon next to the search box: what is it about
A

The open* folders contain the keyword you entered; the closed ones don’t.

* by ‘open’ folders is meant folders that display their inner tree of files and subfolders.

About the folder+magnifier icon:
Clicking it opens the dialog shown below: you can now create search bins.
Benefit 1: your search is made permanent < > standard search.
Benefit 2: your search is more advanced: it can have two variables, with either AND or OR as logic.

178
Q

What’s a handle?

A

given a clip with an In/Out in the Program Monitor or the Source Panel, the handles are the footage before and after the In/Out and that have been left out.
Odd word, but that’s the word.

179
Q

From Source Panel to Timeline,
only migrate video or audio track - how?

A
  1. in Timeline lock the unwanted track
  2. hit Comma

Alternative: in the Source Panel drage, under the clip’s preview either the video or the audio icon

180
Q

track selectors:

  1. ID them in the Timeline panel
  2. give an example of when you need to modify track selectors
A

see the attached picture.

181
Q

Titles-
import a template from Essential Graphics panel - how?

A

just drag and drop onto lowest available video track