Interface Flashcards
The Source Track Indicator column is located in the PP, under the Track ******, at the extreme left. The Source Track Indicator is for source ******** from the ** to your chosen audio or video tracks. Source Track Indicators control the ************ of Insert (,) and Overwrite (.) operations.
The Source Track Indicator column is located in the PP, under the Track Header, at the extreme left. The Source Track Indicator is for source patching from the SM to your chosen audio or video tracks. Source Track Indicators control the destinations of Insert (,) and Overwrite (.) operations.
The audio Levels Meter is shown. It gives you a ****-**** display of the audio levels at particular *****s.

The audio Levels Meter gives you a real-time display of the audio levels at particular frames.
In the image, the user has activated a ***** ****. In this instance, it’s the a ***** **** for the SM. Every Panel has a ***** **** that can be activated by clicking on “menu/three ******** lines” icon at the upper right hand corner of the focused Panel.

In the image, the user has activated a Panel Menu. In this instance, it’s the Panel Menu for the SM. Every Panel has a Panel Menu that can be activated by clicking on “menu/three parallel lines” icon at the upper right hand corner of the focused Panel.
This image shows the Link Media dialog, which is used to re****** media files.
If, after importing a source media file into APP:
you have ***ed that source media file on the hard drive,
or you *****ed that source media file on the hard drive
or you *****ed that source media file on the hard drive
the Link Media dialog will pop up when you enter a Project, to tell you that the source media files for some Clip in that Project are missing.

This image shows the Link Media dialog, which is used to reattach media files.
If, after importing a source media file into APP:
you have moved that source media file on the hard drive,
or you deleted that source media file on the hard drive
or you renamed that source media file on the hard drive
the Link Media dialog will pop up when you enter a Project to tell you that the source media files for some Clip in that Project are missing.
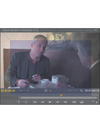
This image shows the SM Panel.
The digital code at the left tells you the current ******** of the PH. The digital code at the right tells you the current Clip’s ********.

This image shows the SM Panel.
The digital code at the left tells you the current location of the pH. The digital code at the right tells you the current Clip’s duration.
This image shows a user trying to make a Sub-Clip within a longer Clip in the SM. The user wishes to create a Sub-Clip out of SM content that runs from
the In Point in the SM
to the **** of the Clip in the SM.
You can see the area in the SM Ruler where the user has set an In Point. The user hits the kbs *** *, enters the **** of the purported subclip, exits. The subclip is now a named Asset in the Project, and can be used in Timeline.

This image shows a user trying to make a Sub-Clip within a longer Clip in the SM. The user wishes to create a Sub-Clip out of SM content that runs from
the In Point in the SM
to the end of the Clip in the SM.
You can see the area in the SM Ruler where the user has set an In Point. The user hits the kbs Cmd U, enters the name of the purported subclip, exits. The subclip is now a named Asset in the Project, and can be used in Timeline.
This image shows the:
Its kbs is:

This image shows the Media Browser Panel
shift 8
This image shows the Effects Control Panel with a ******** View window open. You open and close the ******** View window in the Effects Control Panel by clicking the ******** (ie the Show/Hide Timeline View ********) at the upper (right or left) of the Effects Control Panel.
The Timeline View window is used to position the Keyframes that control the ********* of particular effects.

This image shows the Effects Control Panel with a Timeline View window open. You open and close the Timeline View window in the Effects Control Panel by clicking the triangle (ie the Show/Hide Timeline View triangle) at the upper right of the Effects Control Panel.
The Timeline View window is used to position the Keyframes that control the animation of particular effects.
This image shows the **** Panel

This image shows the Info Panel
This image shows the ******* Panel.
if you open this Panel, you can write comments to remind you of the purpose of the ******.

This image shows the Markers Panel.
If you open this Panel, you can write comments to remind you of the purpose of the ******.
This image shows the ******* Panel.
Within this Panel, the (Left or Right?) Arrow Key permits you to take a step backward, and the (Left or Right?) Arrow Key permits you to re***** decisions you made ‘after trying to step backward.’

This image shows the History Panel.
Within this Panel, the Left or Arrow Key permits you to take a step backward, and the Right Arrow Key permits you to re-enact decisions you made ‘after trying to step backward.’
This Image shows the Effect Contr Panel.
This Panel’s kbs is:
It enables you to control the *********** and animation of ***** and ***** effects.
The effects available for *********** to Clip(s) are listed with disclosure triangles that make ****** numerals and sliders available. These allow you to adjust or ******* (via ********s) effects applied to audio or video Clips in the Timeline.
You disable an effect by toggling off the ** icon near the effect name.

This Image shows the Effects Contr Panel.
This Panel’s kbs is: Shift 7
It enables you to control the application and animation of audio and video effects.
The effects available for application to Clip(s) are listed with disclosure triangles that make orange numerals and sliders available. These allow you to adjust or animate (via Keyframes) effects applied to audio or video Clips in the Timeline.
You disable an effect by toggling off the fx icon near the effect name.
This image shows the Audio Track Mixer Panel.
Its kbs is:

This panel shows The Audio Track Mixer Panel
Its kbs is Shift 6
This image shows the **** Monitor with the ******* Edit Tool between the two clips.

This image shows the Trim Monitor with the Rolling Edit Tool between the two Clips.
This image shows the ***** options in the ****** ******** Panel
You can re******** the image within the frames for the duration of the Clip (eg, to move the image in the frame partially off screen or off to one side for the Clip duration.) You can use the Position x and y fields to do that, or you can use the Manual ******** Adjustment button to re******** in the PM with a bounding box.
You can S**** the image within the frame and hold that for the duration of the Clip.
You can Rotate the angle of the frame, holding that angle for the duration of Clip (a la Batman.) Or you can ‘spin’ the frame around the z-axis for the duration of the Clip by entering multiples of 360 degrees. (eg, entering 3600 makes it spin 10 times.)

This image shows the Motion options in the Effect Controls Panel.
You can reposition the image within the frames for the duration of the Clip (eg, to move the image in the frame partially off screen or off to one side for the Clip duration.) You can use the Position x and y fields to do that, or you can use the Manual Position Adjustment button to reposition in the PM with a bounding box.
You can Scale the image within the frame and hold that for the duration of the Clip.
You can Rotate the angle of the frame, holding that angle for the duration of Clip (a la Batman.) Or you can ‘spin’ the frame around the z-axis for the duration of the Clip by entering multiples of 360 degrees. (eg, entering 3600 makes it spin 10 times.)
Use Keyframes to ******* effects you apply. In the Effects Control Panel, select an effect. Then click the Toggle ********* button (the ‘little watch’ icon) next to the name of the effect - a keyframe appears in the Effects Control ********. Next (only if necessary for that first keyframe) configure the relevant ****** numeric options or sliders. Next, move the ** in the Effects Control ******** to the point where you wish ********* of the effect to ****. Then configure the relevant ****** numeric options or sliders - as soon as you do, you’ll see a second keyframe signifying this ***** moment in the ********* of the effect.
.

Use Keyframes to animate effects you apply. In the Effects Control Panel, select an effect. Then click the Toggle Animation button (the ‘little watch’ icon) next to the name of the effect - a keyframe appears in the Effects Control Timeline. Next (only if necessary for that first keyframe) configure the relevant orange numeric options or sliders. Next, move the pH in the Effects Control Timeline to the point where you wish animation of the effect to stop. Then configure the relevant orange numeric options or sliders - as soon as you do, you’ll see a second keyframe signifying this final moment in the animation of the effect.
This image shows the Effects Panel. Its kbs is Shift *
Effects include video filters, audio effects, and video and transitions. Optional: use the ***** field, at the *** of the panel, to locate the effect by name. You **** and **** these effects onto video or audio Clips in the Sequence.
Eg, to fade in from black screen to the scene in the shot: open the Video Transitions > ******** bin. Find the Film ******** effect. **** and **** the effect onto the start of the first video clip.

This image shows the Effects Panel. Its kbs is Shift 7
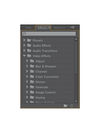
Effects include video filters, audio effects, and video and transitions. You can use the Search field, at the top of the panel, to locate the effect by name, or you can manually open the folders of effects. You drag and drop these effect onto video or audio Clips in the Sequence.
Eg, to fade in from black screen to the scene in the shot: open the Video Transitions > Dissolve bin. Find the Film Dissolve effect. Drag and drop the effect onto the start of the first video clip.
This image shows how any Panel (the Metadata Panel, the Effect Contr Panel, etc etc) can be dragged and ****ed in the SM, becoming a tab at the *** of the SM, for ease of use in tasks like entering metadata for files in the PP/List View, adding and adjusting effects in Clips, etc.
When there are so many Panel ***s at the top of the SM that there is no more room there to display them all: a ****** bar appears across the top of the SM, so you can ***** back and forth to see all the tabs currently docked in the SM.

This image shows how any Panel (the Metadata Panel, the Effect Contr Panel, etc etc) can be dragged and docked in the SM, becoming a tab at the top of the SM, for ease of use in tasks like entering metadata for files in the PP/List View, adding and adjusting effects in Clips, etc.
When there are so many Panel tabs at the top of the SM that there is no more room there to display them all: a slider bar appears across the top of the SM, so you can slide back and foth to see all the tabs currently docked in the SM.
In the image:
The V1 Source Indicator is currently set to ***** video from between the In and Out Points in the SM to the ** Track in the Timeline, but the ** Track isn’t armed.
The ** Source Indicator is currently set to patch audio from between the In and Out Points in the SM to the ** Track in the Timeline – and the ** Track is *****.

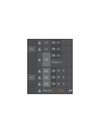
In the image:
The V1 Source Indicator is currently set to patch video from between the In and Out Points in the SM to the V2 Track in the Timeline, but the V2 Track isn’t armed.
The A1 Source Indicator is currently set to patch audiofrom between the In and Out Points in the SM to the A2 Track in the Timeline – and the A2 Track is armed.
The Zoom scroll bar in the SM: useful in isolating problem areas in the audio Clip ********s. The center of the Zoom Scroll Bar is a gray area between two ******s.
The gray area represents a ******* of the Clip currently available for zooming in/zooming out. If you grab one ****** and drag it inward, you zoom in and see a **** detailed graph of the waveform area at the center of the ******* of the Clip currently under analysis by the gray area. But:
You can also drag and relocate the gray area itself, if you wish to zoom in/zoom out on a different ******* of the same audio Clip.

The Zoom scroll bar in the SM: useful in isolating problem areas in the audio Clip waveforms. The center of the Zoom Scroll Bar is a gray area between two sliders.
The gray area represents a portion of the Clip currently available for zooming in/zooming out. If you grab one slider and drag it inward, you zoom in and see a more detailed graph of the waveform area at the center of the portion of the Clip that is currently under analysis by the gray area. But:
You can also drag and relocate the gray area itself, if you wish to zoom in/zoom out on a different portion of the same audio Clip.
Name 7 of the 11 tools in the photo, and give their KBSs:
A: ? (its KBS is:) G: ? (its KBS is:)
B: __ (its KBS is:) H: ? (its KBS is:)
C: __ (its KBS is:) I: (its KBS is:)
D: ? (its KBS is:)J: ? (its KBS is:)
E: ? (its KBS is:)
F: ? (its KBS is:) K: ___ (its KBS is:)

Name 7 of the 11 tools in the photo, and give their KBSs:
A: Selection (its KBS is: v ) G: Track Select (its KBS is: a )
B: Ripple Edit (its KBS is: b ) H: Rolling Edit (its KBS is n )
C: Rate Stretch (its KBS is: r ) I: Razor (its KBS is: c )
D: Slip (its KBS is: y ) J: Slide (its KBS is: u )
E: Pen (its KBS is: p )
F: Hand (its KBS is: h ) K: Zoom TOOL (its KBS is: z )


